Before attempting this mission, it is advisable to train up the team more than for the previous missions put together: Shadowboxer having Dark Vortex, Festus and Anya both equipped with Big Shield, Helena delaing more than 10 damage with Whirlwind and all teammates having above 36 hp would really help for the last battle of this mission. Having the Crimson Orb equipped or the Hero trained up to have Vengeance could come in very handy in the second part of this mission. Also you can always go back to the Mechanic's Base and fight again, to gain some extra money, or fight Vagrant in Somnus.
After completing mission 4, you end up in front of a room with locked doors. You find out that the 'workshop is behind those doors'. In order to open those doors, you'll have to go to the top-left side of the room, past a bridge guarded by the Mechanics and enter an area swarming with Bronze Golems, whom you have to avoid and go until the very end, see the color of the switch indicator, and on your way back change all the switches to the right color- then the door to the workshop will finally open.
Battle One: get across the bridge to the workshop[]
In this battle having the maximum number of flying units can really help. One of the ways to proceed is as follows: use the Shadowlings (and the Hero, if Crimson Orb is equipped) to attack and preferably take down at least one of the two Energy Golems on the left side of the map, Niven's Trick Shot could come in very handy. Then, use the rest of the teammates to re-group on the strip and allow those that have long-ranged attacks to deal damage to the Marksman (e.g. Guy with Pyro Hail), located in the top-middle of the map. Keep an eye on the two Energy Golems on the bottom-right of the map- try not to place teammates in their line of fire. After dealing with the two Energy Golems on the left-hand side and taking out Marskman 1, heal any wounded units and attack the Red Spriggat with your Shadowlings, whilst ensuring that they don't come under fire from Energy Golems and the Marksman on the bottom of the map. Meanwhile, if you have Gamblin' Jack or Helena with high-enough hp, send them against the Bronze Golem and use the Energy Golems to help you defeat them (position attack unit such that an Energy Golem would also backstab the Bronze Golem). During the next few turns wipe out the Golem and the Spriggat, whilst making sure that your units stay healed, so Festus will probably be floating around quite a bit. After this, send your earth-bound teammates around the bend, whilst trying not to expose them to the Energy Golems and keeping to the centre of the map, so that the Marksman on the right-most side of the map can't hurt your teammates. A Mechanic Captain will probably make his way to the bridge by now, but he shouldn't pose any problem for the Shadowlings. By now, you can send Darkling or Niven to use melee attacks against the Marksman located at the very bottom of the map. The next part is really simple and several ways can be used to achieve a win: sending Niven and using his Trick Shot to remove both Energy Golems is the safest method, but could take slightly longer, on the other hand one could also send out Shadowlings and any other teammates with ranged attacks to the bottom of the bridge and gang up on the Golems. Finally, one can choose from a plethora of methods on how to get rid of the last Marksman: the easiest way is to gang up on him, box him in with the Shadowlings, whilst using Niven to attack indirectly and use the Hero or Guy to attack him with Pyro Hail, and that's job done.
The Security Room[]
Next comes the infamous stealth mission, where your Hero will have to make way through six rooms filled with patrolling Bronze Golem guards. First, the Hero has to make his/her way to the last room, the Security Room.
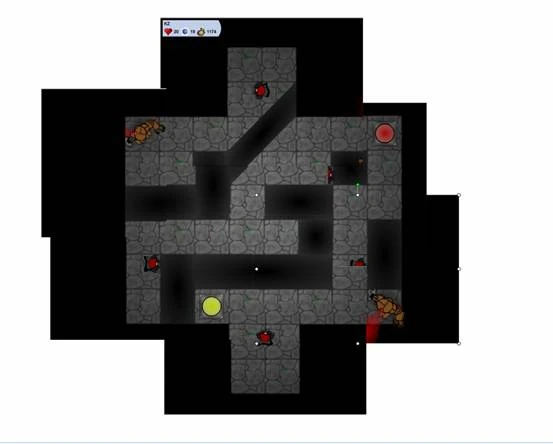
Room 4
In room 4, there is a hidden passageway along the left side of the room, where it looks like it leads to a dead end--just walk to the left far a little bit then up, then right.
If you get into a battle along the way try not to die or you will have to start all over again, as it is a solo battle; if you get into one that is.
Once you reach the Security Room, there will be a big "button" on the far wall. Note the big button's color and go back to the other five rooms to change the small floor buttons to the same color as the big button. After returning from this part of the mission, the doors in the original area just after the Bug Pit will be open and you can finally destroy the Golem Workshop.
Battle Two: destroy the Golem Workshop[]
This is probably the hardest battle you would've faced so far, and it's most adviasable for all your teammates to have high hp, as enemies in this battle all deal at least 10 damage per hit! Thus, one way to proceed is to send Darkling to the left side of the map and attack the Marksman with Shadow Blast, then send Shadowboxer to attack the Bronze Golem on the left with Mind Blast, positioning Shadowboxer in such a way as to force the Bronze Golem to face Shadowboxer and attack him, and in so doing, hit the Marksman with the Spin Saw as well (in the best case scenario, this should kill the Marksman). Next, use any ranged attacks available to destroy the Enery Golem in the middle, whislt sending one of the Fighters to ther right, to distract the second Bronze Golem (it's best to draw out the Bronze Golem to the bottom right corner, so both the Fighter and the Bronze Golem are far away from the fighting about to take place in the center of the map). Proceed then to use Shadowlings in destroying the first Bronze Golem whilst keep their hp high. The hardest part now would be to keep your teammates alive in the center of the map. It's a good idea to use the table in the middle as a buffer and send your teammates through the left side of the map (as it's easier to create a bottle-neck there), placing in front sturdier units and using ranged Psy attacks like Pyro Blast and Pyro Hail extensively. If your Hero has high hp (around 40-45) and Vengeance, then placing him up front and using Vengeance on the enemy could be rather useful. Using area attacks helps greatly here, so Guy and Shadowboxer will be kept very busy during this part of the battle, whislt Darkling can be used to backstab any wounded enemies into oblivion. The enemies in the centre will come in two waves, so this might give you time to heal up any wounded units and maybe send the stringer ones through the bottom or top of the map to encircle the surviving mechanics and gang up on them. Don't forget about the Fighter sent to distract the Bronze Golem- chance are that, throughout the battle you'll have to retreat the unit, heal and then return it to fight the Bronze Golem. Depending on how you trained your team, either the mechanics or the Bronze Golem will fall first, either way, group everyone together around the last one standing and finish him off. Also having bought the items from gelf can help you win this battle too.
After the Battles[]
The victory will leave you in the Energy Golem workshop. It's a good idea to have a thorough look around, as, apart from finding a useful component to install on Flint (the Steam Engine, can be found in the top-right corner of the map, don't be afraid to walk on any debris you see on the floor in order to get to it), you'll also finding a Frost Spriggat standing around at the very top of the workshop. If you talk to him, be nice and play on his boredom, then he'll agree to join your party (this Spriggat, Grotius, is, in fact, Cerzak's son). Finally, you can go back to Somnus, where Tastidian will give you yet another assignment.